This simple screen-cast demonstrates the basic functionality of Mooshabaya , which is mashup generation via Mooshabaya to WSO2 Mashup server. There are some other basic functionalities like WSO2 Governance Registry integration and event monitoring for mashup script execution which are not demonstrated in here. We will publish more explanatory ones once we get the project more towards the completion.
Saturday, November 21, 2009
First screen-cast : Mooshabaya
This simple screen-cast demonstrates the basic functionality of Mooshabaya , which is mashup generation via Mooshabaya to WSO2 Mashup server. There are some other basic functionalities like WSO2 Governance Registry integration and event monitoring for mashup script execution which are not demonstrated in here. We will publish more explanatory ones once we get the project more towards the completion.
Wednesday, November 4, 2009
MoFilm : Learn to Learn : UoM
Learning is something, students do, not something done to students. This mobile movie is directed and produced by a team of students from 06 batch-Faculty of Engineering, University of Moratuwa.
The project is an outcome of my digital video production course coordinated by Department of Computer Science and Engineering. Other team members are displayed at the end of this clip.
Project Proposal-Association Rule Mining with Extended Vertical Format Data Mining
The goal of this research is to propose a better alternative to Apriori algorithm, and proving the efficiency enhancement by using a dataset. With the benchmarks of the datasets, the proposed algorithm will be tested along with the test parameters got from the Apriori Algorithm. The improvements on the performance and efficiency will be published based on the data gathered by the testing for the itemsets.
Friday, September 11, 2009
University of Moratuwa on top of the world in GSoC
The University of Moratuwa (UoM), Sri Lanka became the top of the world in Google Summer of Code 2009 with 22 students accepted for the second consecutive year.
Google Summer of Code (GSoC) is a global program in which Google awards stipends to hundreds of students who successfully complete a requested free software / open-source coding project during the summer.
Congratulations for all the UoM GSoCers for raising the UoM flag up once again.
I'm very proud to be among the top Sri Lankan GSoC 2009 winners, together with my colleagues from the Computer Science and Engineering Department from University of Moratuwa.
This is because the Computer Science and Engineering department of University of Moratuwa promotes the students to participate to this competition. Especially the open source software organizations like WSO2 Inc. and Lanka Software Foundation promote and guide students on applying for GSOC. Though there is very few open source software organizations located in Sri Lanka, the contribution they have made with the participation of University of Moratuwa towards this remarkable success is marvelous.
Finally I congratulate all the Sri Lankan students who were accepted and completed their GSoC projects for last 4 years and made this small island, Sri Lanka into a rising star.
For more Details Google Open source blog.
Related blog post - My first hands on experiences on Google Summer of Code
Wednesday, September 9, 2009
Confession for the last three years at university
I passed O/L in 2002. Then A/L in 2005. Came to University of Moratuwa in 2006.
Since then, I lived on my own and I had only one ambition. It was "to do what I love, and to love what I do". And still it's same as it is. :)
Spent 1st year on studying different engineering aspects and engineering mathematics. Decided to specialize on Computer Science and Engineering field. Then spent 2nd and 3rd years at the Computer Science and Engineering department.
Then in the 2nd semester of the 3rd year we went for the industrial training. I chose WSO2 Inc. as the training place. And then I was selected to Google Summer of Code 2009.
After 10 months industrial training period we had 2 months vacation (not really :)).
So after one year of a non-academic period, the dawn of the next week is the start of the 4th academic year.
Last three years at university were awesome, and the 3rd year was AWESOME. 3rd year internship period was filled with life changing experiences. All of my colleagues would agree with me on it. As well all of us may remember how we worked hard when exams came near. :)
I became a huge fan of European, Hollywood and Sinhala movies and learned some stuffs on cinematography and still photography last year. No matter how much work I have on my back, I spend hours and hours on watching movies.
Anyway 43.5 credits to be earned and the Final year project to be completed in the next year and I'll be the same old me.
Sunday, August 16, 2009
Writing a simple WS-BPEL process for WSO2-BPS and Apache ODE
I've written an article on The WSO2 OxygenTank explaining the fundamentals on writing and deploying a simple BPEL which interacts with several partner services, in WSO2 BPS and Apache ODE.
So this article focuses on the basic functionalities such as: how to invoke partner services from a BPEL process, how to wait for a message from a client who invokes a BPEL process etc. A sample BPEL process called "FunctionProcess" is also attached to the article, with required sample partner services. All examples are based on the attached sample code.
The article flows based on the following topics.
- What is a business process?
- What's BPEL?
- Basic terms used in the BPEL terminology
- How to deploy sample partner services and the BPEL process
- How to establish a partner link with a Web service
- How to invoke the BPEL process from a client
- How to invoke a partner Web service from the BPEL process
- How to reply to the client from the BPEL process
- How to do basic variable manipulation in a BPEL process
- How to Deploy and test the BPEL process
Wednesday, July 29, 2009
The project Mooshabaya (මූෂාභය) - Brings the knowledge from workflow domain to Mashup domain
The idea for the project "Mooshabaya" was emergerged as a final year project, coordinated by the department of Computer Science and Engineering, University of Moratuwa.
The project "Mooshabaya" targets to generate Mashups to describe the composed workflows, by modifying XBaya Workflow Composer.
XBaya addresses the above mentioned issue regarding to the modeling of workflows based on web services. It is a graphical client program for workflow composition and monitoring. It provides an easy-to-use GUI for users to compose workflows from Web Services described in WSDL. It helps the developer to build a graphical representation of the workflow. To facilitate the execution phase of the workflow XBaya also enables the developer to insert the concrete deployment details such as end point URLs present in WSDLs to the workflow model metadata as well. To actually make it executable in real world this workflow model has to be converted in to an executable format which can be deployed within an existing workflow execution engine. BPEL is such executable workflow language which can be run inside a WS-BPEL compliant workflow engine. BPEL has been standardized by OASIS standard body. Currently conversion to BPEL from the XBaya workflow model is present where the converted workflow can be deployed in BPEL engines such Apache ODE.
XBaya currently exports the composed workflows into BPEL and Jython. Though Mooshabaya focuses and uses XBaya as its workflow composer, it can easily be generalized to be compatible to any other workflow composer. Mooshabaya will find the services from a service Registry, which governs SOA deployments, and the composed workflows are deployed into a Mashup Server as mashups.
Let's take a look at on what a mashup is. A mashup is a web application that combines data or functionality from two or more sources to create a new service. It enables fast and easy integration of services and data sources using open API s. This enables the realization of workflows in yet another format and which seems to be very promising due to the proliferation of web services and mashup enabled services on the Internet, a classical example being highly popular Google Maps. Currently there is no mechanism to export XBaya workflow models to mashups which we feel is a significant shortcoming. So we intend to fill this void by extending the XBaya export mechanism to include mashup exports. Also to facilitate monitoring of the workflow during its execution we intend to introduce event notification facility in the generated mashup codes.
How a simple mashup looks like.
Here is a simple mashup that will invoke a partner service "AdderService" and return the result inside "invokeFunctionProcessService" operation.
/*
* Licensed under the Apache License, Version 2.0 (the "License");
* you may not use this file except in compliance with the License.
* You may obtain a copy of the License at
*
* http://www.apache.org/licenses/LICENSE-2.0
*
* Unless required by applicable law or agreed to in writing, software
* distributed under the License is distributed on an "AS IS" BASIS,
* WITHOUT WARRANTIES OR CONDITIONS OF ANY KIND, either express or implied.
* See the License for the specific language governing permissions and
* limitations under the License.
*/
this.serviceName = "FunctionProcess";this.documentation = "Invoke AdderService" ;
system.include("AdderService.js");
invokeFunctionProcessService.inputTypes={"param0" : "Number", "param1" : "Number"};
invokeFunctionProcessService.outputTypes="Number";
function invokeFunctionProcessService(param0, param1)
{
var adderServiceResponse = AdderService.add(param0, param1);
return adderServiceResponse;
}
So this approach enables to create workflows and business process (like BPEL processes) using in simple javascript.
Things to be figured out - Still, we do not have a clear image on how the mashup domain and the mashup technologies would fit in to the existing workflow domain. So still we are not sure about the actual functional requirements of this project.
We are still in the initial stage of this project. So in future we'll bring you more information in a more official way.
Link - http://mooshabaya.sourceforge.net/
IRC channel - ##m2sc on freenode
Project Members - De Alwis, K.D.B.C.
Malinga, A.S.
Pradeeban, K.
Weerasiri, W.A.D.D.
External Mentors - Dr. Srinath Perera
Dr. Sanjiva Weerawarana
Internal Mentors - Mrs. Vishaka Nanayakkara
Saturday, June 20, 2009
Graphical representation generation for a WS-BPEL business process
This blog post is focused on one of my project I contributed to during my internship. This post will also be helpful on who are interested in SVG (Scalable Vector Graphics), BPEL (Business Process Execution Language) and BPM (Business Process Management).
WS-BPEL (Web Services Business Process Execution Language) is XML based programming language used for develop business and scientific work-flows.
It can be used to define Abstract and Executable business processes. Work-flows, implemented in WS-BPEL exchange information by using Web service interfaces.
As previously mentioned WS-BPEL is a XML based language, it does not define a graphical representation for the process or provide any particular design methodology for processes. So there is no any standard graphical notation for WS-BPEL. But most persons find visual notations easier to learn and apply, perhaps because they process visual information more efficiently than textual information, which led some vendors to define their own graphical notations.
The Business Process Modeling Notation (BPMN) is a standardized graphical notation for drawing business processes in a work-flow.
My project was to design and develop a software component that extrapolate the necessary information for displaying a WS-BPEL work-flow instance as an SVG representation. Before get-in to the design phase I researched on the following key-areas.
- Familiarizing with WS-BPEL language, with the existing BPEL-supporting software and with the Web Service stack
- Familiarizing with the SVG libraries and features
- Analyzing the previously done BPMN work-flow and BPEL work-flow viewers and understanding its design and functionalities
- Analyzing how the BPEL process engine can capture instance-related information in terms of work-flow status
The project was targeted on WSO2-BPS and Apache-ODE which are open source Java-based BPEL engines, released under Apache License 2.0.
I used Apache Batik libraries for manipulate SVG documents.
SVG is a XML-based specification to describe two-dimensional vector graphics. SVG is also well-suited to smart phones and mobile devices. All major modern web browsers except Microsoft Internet Explorer support and render SVG markup directly. To view SVG files in Internet Explorer, users have to download and install a browser plug-in.
Final outcome is similar to something like this.

This post is still to be completed and more information on design, the source repository locations and some original screen-shots will be published soon.
Sunday, June 14, 2009
My first hands on experiences on Google Summer of Code

This blog post is focused on my Google summer of code project and some tips for folks who are interested in involving with GSoC as students.
GSoC is a annual program held globally that offers student developers stipends(around $4500) to contribute to various open source projects. Historically, the program has brought together over 2,400 students with over 230 open source projects, to create millions of lines of code. Students can get a good exposure to real-world software development scenarios, like distributed development, software licensing, mailing list etiquette, etc.
But having an idea on the above scenarios as early as possible, everything will be a lot more easier in successfully completing the GSoC project.
As there are hundreds of organizations which focus on different aspects, first of all the students need to select a organization based on their preference.
If you are not much familiar with the org. domain you may need to read the articles, tutorials published by the org. As well you need to subscribe to the mailing list or IRC channel for asking more details.
Then you need to come up with an project idea In this case it's much better the ideas comes from the student's side. Then in the mailing list those ideas need to be discussed and get some feedbacks from the org. (Do not worry! Your ideas are not gonna be stolen by others). If there's no feedback for a reasonable time, then reply to that thread with more details.
When discussing on mailing lists there are some etiquette that needed to be concerned. Sometimes the etiquette depends on the org. But there are some common things, anyone needed to understand on open source mailing list etiquette.
Here is an example specific to GSoC went under Apache ODE mailing list.
Open and early communication with the org. will be beneficial for you as all most all the org.s appreciate it.
After that student application period opens. To win a competitive stipend program like the Summer of Code, you'll be competing against an unknown number of people of unknown quality from all over the world. I know you're good, but they're good, too. You need to try to write the best application that the mentor will see. Here mentor is a person from the org. who evaluates the proposals.
The proposal template is depend on the org. If there is a specific template , it will be published on the project site. Normally you need to give a good impression from the proposal that you can successfully completed the project with the given deadline.
Here is my project proposal which became a top voted project proposal in GSoC 2009 for Apache Software foundation.
Normally a project proposal is published as a Wiki page or a on-line document even though it is submitted to the GSoC for evaluations. A good practice is to send the proposal to the mailing list and ask some feedbacks from the mentors for more modifications before submit it to the google.
The mentors will respond to that thread and it will be beneficial in final proposal evaluations.
Be sure to submit your proposal to Google early enough to avoid the unexpected circumstances.
Do not stuck on the GSoC time-line, start and try to contribute to the project as early as possible. When selecting a org. you do not have to wait until Google publishes the accepted orgs. You can count on the orgs which were selected in previous years for GSoC.
In GSoC 2009 time-line it's only 5 days allocated for discussion about project ideas with the orgs. But it is not enough to get an good idea about the project and to write a good proposal. So to write a good proposal students need to discuss the ideas much earlier.
Send some patches on what you have done to the project issue tracker. So that you can mention them on the proposal. Here is an example related to my project.
The proposal evaluation protocol depends on the org. The project proposal need to be changed based on that protocol. So it is essential to be alert on the web sites related to the project, or you can ask those related issues via the mailing list.
After submitting the proposal as well, you need to be so alert on mails, as the mentors may need to communicate with you for more details and sometimes they will ask you to submit a patch to ensure that you are capable of developing the project.
Here you can get more detailed advices for students regarding GSoC.
Monday, May 18, 2009
Let's build WSO2 Carbon from source code (For newbies to WSO2 Carbon)
WSO2 Carbon is the base platform for all WSO2 Java products.
Built on OSGi, Currently In Carbon there are 4 main SOA functionalities. They are as follows.
If you are willing to develop WSO2 Carbon , it is essential to build WSO2 Carbon from source rather than using a binary distribution. Building from source ensures that the source exists and compiles properly, which is the basis of regular open-source development.
By compiling from source, if you find some code you are able to isolate patches to address such problems, without having to wait for upstream.
Although bytecode runs on every vm that supports the version of the bytecode in question it does not mean that the bytecode produced by different compilers is equal. Bytecode can be optimized too. By building from source, we make it easy to switch the compiler used to compile your installed java programs.
Let's start build Carbon from source code
First of all you need Subversion (SVN) which is a version control system widely used in open source software development. You can install SVN from here based on your operating system.
Then also you need to install the build tool called Apache Maven. It is a open source Apache build manager for java projects. You can install Apache Maven from here.
Go to WSO2 Oxygen Tank SVN repository. Here you will see all the SVN repositories for all WSO2 products.
For WSO2 Carbon you have to checkout the following SVN repositories one by one to a specific location in local hard disk.
For that use "svn checkout" command.
e.g. ...../carbon$ svn checkout https://svn.wso2.org/repos/wso2/branches/carbon-platform/2.0
Now there will be a directory structure created as as follows.
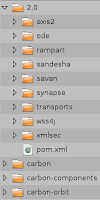
Then you will realise that there is a specific directory for each checkout you made. In each of those dirctoriers you will find (at the root level) a file called "pom.xml". It represent the complete Maven project and using that you can build the project from the source code.
Before build the project first of all we need to install the following plugins and modules which enables you to build the above project source codes successfully. Those plugins source codes are also get downloaded when checking out the https://svn.wso2.org/repos/wso2/branches/carbon-platform/2.0/axis2/ repository. You just have to install them using Maven.
For that go to "axis2" directory which is the first checkout you made. In that go to "modules/tool".
There you can see "axis2-aar-maven-plugin" and "axis2-mar-maven-plugin" named directories. In those directories you will see the pom.xml file for each. You have to go to those directories one at a time and build those plugins using Apache Maven with following commands in the console.
mvn clean install
(This is a command in Maven use to build the project with the help of "pom.xml" file and for more information use this Quick Guide)
After successfully install those plugins you can start to build the above checkedout projects one by one.
In console use command "mvn clean install -Dmaven.test.skip=true" in the root level of each directory as follows.
e.g. To build "axis2" go to the "axis2" directory , which is the directory the source is checked out from the repository https://svn.wso2.org/repos/wso2/branches/carbon-platform/2.0/axis2/. In console use the command as follows.
Such that use the following commands under the given directories with the given sequence.
Note - You have to build those 10 soucre directories one at a time and according to the given sequence as the later project source codes are depend on a prior project source codes. "ode" and "xmlsec" source directories are not required to be built.
After successfully building all 10 projects' source codes WSO2 Carbon is built from the source.
As well you can create IDE(Eclipse, IDEA, NetBeans) based projects using the Maven plugins.
Built on OSGi, Currently In Carbon there are 4 main SOA functionalities. They are as follows.
- WSO2 Web Services Application Server (WSAS)
- WSO2 Enterprise Service Bus (ESB)
- WSO2 Registry
- WSO2 Business Process Server (BPS)
If you are willing to develop WSO2 Carbon , it is essential to build WSO2 Carbon from source rather than using a binary distribution. Building from source ensures that the source exists and compiles properly, which is the basis of regular open-source development.
By compiling from source, if you find some code you are able to isolate patches to address such problems, without having to wait for upstream.
Although bytecode runs on every vm that supports the version of the bytecode in question it does not mean that the bytecode produced by different compilers is equal. Bytecode can be optimized too. By building from source, we make it easy to switch the compiler used to compile your installed java programs.
Let's start build Carbon from source code
First of all you need Subversion (SVN) which is a version control system widely used in open source software development. You can install SVN from here based on your operating system.
Then also you need to install the build tool called Apache Maven. It is a open source Apache build manager for java projects. You can install Apache Maven from here.
Go to WSO2 Oxygen Tank SVN repository. Here you will see all the SVN repositories for all WSO2 products.
For WSO2 Carbon you have to checkout the following SVN repositories one by one to a specific location in local hard disk.
- https://svn.wso2.org/repos/wso2/branches/carbon-platform/2.0
- https://wso2.org/repos/wso2/trunk/carbon-orbit
- https://wso2.org/repos/wso2/trunk/carbon
- https://wso2.org/repos/wso2/trunk/carbon-components
For that use "svn checkout" command.
e.g. ...../carbon$ svn checkout https://svn.wso2.org/repos/wso2/branches/carbon-platform/2.0
Now there will be a directory structure created as as follows.

Then you will realise that there is a specific directory for each checkout you made. In each of those dirctoriers you will find (at the root level) a file called "pom.xml". It represent the complete Maven project and using that you can build the project from the source code.
Before build the project first of all we need to install the following plugins and modules which enables you to build the above project source codes successfully. Those plugins source codes are also get downloaded when checking out the https://svn.wso2.org/repos/wso2/branches/carbon-platform/2.0/axis2/ repository. You just have to install them using Maven.
For that go to "axis2" directory which is the first checkout you made. In that go to "modules/tool".
There you can see "axis2-aar-maven-plugin" and "axis2-mar-maven-plugin" named directories. In those directories you will see the pom.xml file for each. You have to go to those directories one at a time and build those plugins using Apache Maven with following commands in the console.
mvn clean install
(This is a command in Maven use to build the project with the help of "pom.xml" file and for more information use this Quick Guide)
After successfully install those plugins you can start to build the above checkedout projects one by one.
In console use command "mvn clean install -Dmaven.test.skip=true" in the root level of each directory as follows.
e.g. To build "axis2" go to the "axis2" directory , which is the directory the source is checked out from the repository https://svn.wso2.org/repos/wso2/branches/carbon-platform/2.0/axis2/. In console use the command as follows.
- $current-location/axis2$ mvn clean install -Dmaven.test.skip=true
Such that use the following commands under the given directories with the given sequence.
- To build transports-> $curr.-location/2.0/transports$ mvn clean install -Dmaven.test.skip=true
- To build wss4j-> $curr.-location/2.0/wss4j$ mvn clean install -Dmaven.test.skip=true
- To build rampart-> $curr.-location/2.0/rampart$ mvn clean install -Dmaven.test.skip=true
- To build sandesha-> $curr.-location/2.0/sandesha$ mvn clean install -Dmaven.test.skip=true
- To build savan-> $curr.-location/2.0/savan$ mvn clean install -Dmaven.test.skip=true
- To build synapse-> $curr.-location/2.0/synapse$ mvn clean install -Dmaven.test.skip=true
- To build carbon-orbit-> $curr.-location/carbon-orbit$ mvn clean install -Dmaven.test.skip=true
- To build carbon-> $curr.-location/carbon$ mvn clean install -Dmaven.test.skip=true
- To build -carbon-components> $curr.-location/carbon-components$ mvn clean install -Dmaven.test.skip=true
Note - You have to build those 10 soucre directories one at a time and according to the given sequence as the later project source codes are depend on a prior project source codes. "ode" and "xmlsec" source directories are not required to be built.
After successfully building all 10 projects' source codes WSO2 Carbon is built from the source.
As well you can create IDE(Eclipse, IDEA, NetBeans) based projects using the Maven plugins.
Friday, May 15, 2009
Home made FOSS
This blog is focused on starting a simple FOSS (Free and Open Source Software) project on your own based on the free resources from the Internet.
Let's look at the basic resources associated with an open source project.

Source code repository
Source code repository is used to store the whole collection of source code used to build a particular component or an application. Typically, the source code includes only human-written source code files, and not, e.g., source code files generated by other tools or binary library files. However, it generally does include configuration and property files. A source code repository becomes handy when the project is developed by many people around the world, which is a normal scenario for large open source projects. Source code repository enables the developers to work together on the project as well people who are interested in the project can go through the source code.
- There are many project hosting sites you can use for your project. All most all of them support for source code hosting. Some of them are as follows.
There are other project hosting sites such as mozdev.org which provide project hosting services for projects under specific requirements. You can find more details on those project hosting sites here.
- The following snapshot is from Google code where the initial project creation take place.

- Here you can choose the source code license based on you choise. This source code license determines how others can use your code. Read more informations on the open source licenses on Open Source Initiative.
Executable binaries
- The executable binary is created by converting written human readable programs (called "source code" or simply "source" or "code") into machine language in a process that is called "compiling". Source code can be read and modified (if you know the language), which means, if you had unfettered access to it, you can also alter it to suite your needs. So normally executable binaries are released based on the operating platform.
eg -
- Documentations are also very important for a FOSS project as it either explains how it operates or how to use it, and may mean different things to people in different roles. Types of the documentation are,

Nightly build downloads
- This means creating daily builds from the source code. Nightly builds may be used for testing purposes. Sometimes these builds may be used by the users. Ultimately these builds helps to track whether the source code is stable or not up-to the build date.
Project mailing list
- Normally all most all the discussions related to an open source projects are happened via mailing lists. Anybody interested in a particular FOSS project can join to the public mailing lists hosted for that particular FOSS project. Normally there are two public mailing lists knows as Developer mailing list and User mailing list for a project.
Developer mailing list is used for discussions related to project development. User mailing list is used for discussions from user perspective. Some times there may be private mailing lists related to internal discussions.
Project wiki
- Project wiki is a set of wiki pages related to the project details. People can edit create new pages, edit them. So project wiki is some kind of a collaborative thing rather than documentation which is produced by a particular set of people. Here is a snapshot of a project wiki page on Google code.

Issue tracking systems
- For a software project an issue tracking system is an essential resource. It manages and maintains the list of issues related to project. People can create, update, comment, resolve, close etc. the issues regarding the project. Here you can find more details regarding the features of issue tracking systems. Here is a snapshot on project issue tracker page on Google code.

Forums
- On-line forums are also used on discussions regarding the project. Logically forums are organized into a finite set of generic topics (usually with one main topic) driven and updated by a group known as members, and governed by a group known as moderators.
To commence a FOSS project there are many project hosting sites like Google-code, Source-Forge etc. Google-code is one of the most easiest and the flexible project hosting service you can rely on. You can also try others as well.
Google-code provide basic resources required for a basic FOSS project. Here are some other snapshots of the project site hosted on Google-code.


Let's look at the basic resources associated with an open source project.

Source code repository
Source code repository is used to store the whole collection of source code used to build a particular component or an application. Typically, the source code includes only human-written source code files, and not, e.g., source code files generated by other tools or binary library files. However, it generally does include configuration and property files. A source code repository becomes handy when the project is developed by many people around the world, which is a normal scenario for large open source projects. Source code repository enables the developers to work together on the project as well people who are interested in the project can go through the source code.
- There are many project hosting sites you can use for your project. All most all of them support for source code hosting. Some of them are as follows.
- Google-code
- Source-Forge
There are other project hosting sites such as mozdev.org which provide project hosting services for projects under specific requirements. You can find more details on those project hosting sites here.
- The following snapshot is from Google code where the initial project creation take place.

- Here you can choose the source code license based on you choise. This source code license determines how others can use your code. Read more informations on the open source licenses on Open Source Initiative.
Executable binaries
- The executable binary is created by converting written human readable programs (called "source code" or simply "source" or "code") into machine language in a process that is called "compiling". Source code can be read and modified (if you know the language), which means, if you had unfettered access to it, you can also alter it to suite your needs. So normally executable binaries are released based on the operating platform.
eg -
- Zipped (.zip) archives for Windows platform (for each version of the product)
- Tar balls (.tar.gz) for Linux platform (for each version of the product)
- Documentations are also very important for a FOSS project as it either explains how it operates or how to use it, and may mean different things to people in different roles. Types of the documentation are,
- Requirements - Statements that identify attributes, capabilities, characteristics, or qualities of a system. This is the foundation for what shall be or has been implemented.
- Architecture/Design - Overview of software. Includes relations to an environment and construction principles to be used in design of software components.
- Technical - Documentation of code, algorithms, interfaces, and APIs.
- End User - Manuals for the end-user, system administrators and support staff.
- Marketing - How to market the product and analysis of the market demand.

Nightly build downloads
- This means creating daily builds from the source code. Nightly builds may be used for testing purposes. Sometimes these builds may be used by the users. Ultimately these builds helps to track whether the source code is stable or not up-to the build date.
Project mailing list
- Normally all most all the discussions related to an open source projects are happened via mailing lists. Anybody interested in a particular FOSS project can join to the public mailing lists hosted for that particular FOSS project. Normally there are two public mailing lists knows as Developer mailing list and User mailing list for a project.
Developer mailing list is used for discussions related to project development. User mailing list is used for discussions from user perspective. Some times there may be private mailing lists related to internal discussions.
Project wiki
- Project wiki is a set of wiki pages related to the project details. People can edit create new pages, edit them. So project wiki is some kind of a collaborative thing rather than documentation which is produced by a particular set of people. Here is a snapshot of a project wiki page on Google code.

Issue tracking systems
- For a software project an issue tracking system is an essential resource. It manages and maintains the list of issues related to project. People can create, update, comment, resolve, close etc. the issues regarding the project. Here you can find more details regarding the features of issue tracking systems. Here is a snapshot on project issue tracker page on Google code.
Forums
- On-line forums are also used on discussions regarding the project. Logically forums are organized into a finite set of generic topics (usually with one main topic) driven and updated by a group known as members, and governed by a group known as moderators.
To commence a FOSS project there are many project hosting sites like Google-code, Source-Forge etc. Google-code is one of the most easiest and the flexible project hosting service you can rely on. You can also try others as well.
Google-code provide basic resources required for a basic FOSS project. Here are some other snapshots of the project site hosted on Google-code.
- Project home page

- Project source code details

Saturday, May 2, 2009
How to deploy an Axis2 Web service programatically in ODE during the initialization of ODE Runtime
Description on ODE
Apache ODE (Orchestration Director Engine) executes business processes written following the WS-BPEL standard. It has two communication layers. One is Axis2 integration layer and the other one is based on JBI standard. Those integration layers are used by ODE BPEL Engine Runtime for interact with the outside world. Axis2 integration layer supports for communicate via Web Service interactions. JBI integration layer supports for communicate via JBI messages. Here I have discussed about how to deploy an Axis2 service programatically in ODE during the initialization of Apache ODE.
Why deploying services at the initialization
We can deploy Axis2 web services in ODE in various ways. One way is just dumping and AAR (axis2 archive) in the services directory inside the ODE's deployment directory. In this method axis2 service can be deployed and undeployed them as user's choice. But suppose if we need to deploy a web service which provides a common functionality for all deployed business processes in ODE like ODE Management API then those kind of Web services need to be deployed during the initialization of ODE. ODE Management API is a axis2 Web service deployed in ODE during the initiation of ODE Run Time. This service monitor and manage all the business processes deployed in ODE. Another service which is deployed as same before is Deployment service which is used for deploy WS-BPEL processes. So if someone interested in developing a Web service which act as a generic feature for ODE like ODE Management API , that Web service must be deployed programatically during the initiation of ODE run time.
Basic overview of the process
How to deploy an axis2 Web service generally
There are several ways of deploying a axis2 Web service programatically.
1. One method is using the service archive file (AAR distribution).
Here we create an object of service archive file and a pointer to axis2 runtime or configuration context. Using the below code we can create the web service as follows.
This process is is almost same as putting the service archive file in the deployment directory.
2. Another method does need neither a services.xml nor a repository. In this POJO deployment it is only need axis2-1.4.jar and other dependent libraries.
Here MyService is the service implementation class. In this method as a services.xml is not existed, the degree of freedom for configure the service is very much less.
3. Final method does not need a services.xml, but it gives the freedom to configure the service such as by specifing message receivers etc. I prefer this method to deploy a axis2 Web service programatically during the initiation of ODE runtime.
Here when creating the service the message receiver is set and for more information refer org.apache.ode.axis2.service.ManagementService class. In org.apache.ode.axis2.service.ManagementService.DynamicMessageReceiver you may see how the service operations are invoked.
How to deploy the axis2 service in ODE runtime
Let see how to how to deploy an axis2 service programatically in ODE runtime. In this section it contains the ODE specific information which related to the axis2 service deployment.
ODEServer.java
To deploy a service in ODE runtime programatically org.apache.ode.axis2.ODEServer is normally used. Actually this class is the starting point for a execution of a ODE WAR distribution. If you look at the source code you may see almost all the basic resources are initialized in the org.apache.ode.axis2.ODEServer#init method.
In the init() method above syntaxes are used to deploy the Process ans Instance management service which is a basic management service in ODE runtime. In the above enableService() method the service deployment logic is implemented. That implementation can be any method as I described on the previous section.
Writing WSDL and the schemas and put the into the correct modules
Now the required WSDL and the related schemas should be placed in specific places on the ODE source in order to deploy the service.
Location for the WSDl - axis2/src/main/wsdl/
Location for the related schemas - bpel-schemas/src/main/xsd/
These resources should be kept in those specific packages, othervise while creating the WAR distribution required code generations, schema compilations will not be happened.
Creating .xsdconfig file for a schema
As I explained earlier schema files should be kept in a specific location (bpel-schemas/src/main/xsd/) in order to happen the code generation process succesfully. As well for each schema file it is required to created another file with the same name of the schema file and with .xsdconfig extention at the same location where the schema files are existed. This .xsdconfig file is needed for denote the target package for the generated bean classes. For example for pmapi.xsd the .xsdconfig file is pmapi.xsdconfig.
RakeFile Modification
After that, the "Rakefile" located at the root of ODE source should be configured. Rakefile contains executable Ruby code. Using that Ruby code, Apache Buildr will build the ODE source. In Rakefile it is need to mention about the newly added schema files in order to code generations and to populate the schema file in the WAR distribution. At the following places in the Rakefile you need to modify the Ruby code based on the added schemas.
Note: If you add the schema definitions in the WSDL itself, then there is no way of bean geaneration for thoes schemas.
Compilatation of schemas and bean class generation is handled by the following Ruby code snippet.
Rebuilding using buildr
Now re-building the source code using Apache Buildr, a WAR distraibution will be generated with the modifications you made.
Sunday, April 19, 2009
How to build ORYX editor in Ubuntu
Introduction
Oryx editor is a web based BPMN (Business Process Modeling Notation) editor. Oryx is a project of the Business Process Technology research group at the Hasso Plattner Institute of IT Systems Engineering at the University of Potsdam, Germany. The research group is led by Professor Mathias Weske, as is the Oryx project.
This blog is focused on building Oryx from the source in Ubuntu.
This blog is focused on building Oryx from the source in Ubuntu.
RequirementsJ2SE 5 Java Runtime Environment or higher
SubVersionApache Tomcat server (5.5 or higher)
Apache Ant 1.6 or higher
Checkout the sourceFirst you have to check out the source from the SubVersion repository
svn checkout http://oryx-editor.googlecode.com/svn/trunk/ oryx-editor-read-only
After checking out the source you have to build the source using Ant. But before that you need to configure the database server which used to store the Oryx business process models. Here I have described on configuring the PostgreSQL database server.
Configure the PostgreSQL database 1.Install PostgreSQL sudo apt-get install postgresql-8.3 postgresql-plpython-8.3
2.Then we have to configure the database such that it does not require passwords for local tcp connections. Before that if the database server is started you have to stop it using the following command.
/etc/init.d/postgresql-8.3 stop
3.For that client authentication configurations for the database have to be changed. Traditionally these configurations are stored in pg_hba.conf file located at /etc/postgresql/8.3/main.
Modify the configurations as follows.
# Database administrative login by UNIX sockets
local all postgres ident sameuser
# TYPE DATABASE USER CIDR-ADDRESS METHOD
# "local" is for Unix domain socket connections only
local all all trust
# IPv4 local connections:
host all all 127.0.0.1/32 trust
# IPv6 local connections:
host all all ::1/128 md5
4.Then start the database using the following command
/etc/init.d/postgresql-8.3 start
5.Now using the following commands you have to create a user called “poem” without password.
su postgres
createuser --superuser --echo poem
Now PostgreSQL database configuration process is completed such that there is user called “poem” which can connect to the database without passwords and database server trusts all the tcp local connections. Now all the requirements for the building process are completed.
Building the source
Before building the source you need to modify the build.properties configuration file located at the root of Oryx source. You need to change “deploymentdir” in build.properties to the full path to the tomcat deployment directory.
eg. deploymentdir = /opt/installations/tomcat1/apache-tomcat-6.0.18/webapps
If you go into the root of Oryx source directory you may see a dependency graph (build-dependencies.png) which depicts on how the Ant targets are inter-dependent.
Now using the following command the Oryx source can be build.
ant rebuild-all
Like wise using the ant targets you can compile, clean, build, deploy Oryx.
As well you have to create the database which stores the Oryx business process models using the following commands.
/etc/init.d/postgresql-8.3 start
ant create-db
In this case if you have configured the PostgreSQL database server correctly, no password will be asked during the database creation and the database will be created without an error.
Then to deploy the Oryx editor use the following commands.
ant deploy-all
Now if you go in to the tomcat deployment directory you may see two WAR distributions called backend.war and oryx.war. Extract both of them. Now by starting the tomcat engine you can deploy the Oryx editor.
Finally you can open the Oryx model repository in Firefox3.
http://localhost:8080/backend/poem/repository
How to play with software patches.
In an open source world, if you are interested in contributing to an open source project by developing the source code first of all you need to build the source code. Then you have to submit the code you developed for that project through a patch or directly changing the code. If you are not a commitor for that project you can't directly change the source code. A commitor is a person who has source code modification rights for a open source project. If you are not a commitor then you have to submit what you have done through a patch.
A patch is a textual format file which contains the modifications has been done related to the original source code of a software project in open source terms. An example of an patch is as follows.
Index: Rakefile
===================================================================
--- Rakefile (revision 752423)
+++ Rakefile (working copy)
@@ -175,6 +175,12 @@
web_inf.merge project("dao-hibernate-db").package(:zip)
web_inf.include project("axis2").path_to("src/main/wsdl/*")
web_inf.include project("bpel-schemas").path_to("src/main/xsd/pmapi.xsd")
+ web_inf.include project("bpel-schemas").path_to("src/main/xsd/dmapi.xsd")
+ web_inf.include project("bpel-schemas").path_to("src/main/xsd/breaks_bdi_bpel.xsd")
+ web_inf.include project("bpel-schemas").path_to("src/main/xsd/common_bpel.xsd")
+ web_inf.include project("bpel-schemas").path_to("src/main/xsd/java_util.xsd")
In a patch file it contains details on what lines have been added with a “+” sign and what lines have been removed with a “-” sign.
Let see how to create an patch file first. As I mentioned earlier first of all you have to build the source code of the project. Here you may use an version controlling software like “SubVersion” to manage and update your local source code with the online source code repository. This version controlling tool can used to create a patch for the modifications what you have done in your local source code. In SubVersion the command is as follows.
svn diff > bug-x-free.patch
The above command will create a patch file named “bug-x-free.patch”. For more details on creating custom patches can be found on here.
Then that patch file can be submitted through the particular project issue tracker (like JIRA, Bugzilla etc.)
Then the patch will be examined by a project commitor and added to the source code.
Note: Be careful to test the local modified source code whether it's working OK before submitting the patch.
Suppose you need to add a patch file to your local source code, then you can use the following command at the root of your source directory to add the patch the source code.
patch -p0 -i bug-x-free.patch
Then your source code will be modified based on the patch file.
Suppose then you want to revert the patch you added. The reverting functionality is not supported by patch command it-self. Then what you can do is to interchange the “+” with “-” in the patch file to revert the changes as those “+” and “-” signs are used to denote the added code line and removed code lines in the source code. Then again by using the above patch command you can revert the modifications occurred by the original patch file.
Sunday, April 12, 2009
Remarkable performances made by Sri Lanka in GSOC
When I went through the Google Summer of Code statistics for last four years I observed the remarkable performances made by Sri Lankan students. Especially the University of Moratuwa has become the top university for the number of accepted students for GSOC projects over the last four years with a count of 57.
This is because the Computer Science and Engineering department of University of Moratuwa promotes the students to participate to this competition. Especially the open source software organizations like WSO2 Inc. and Lanka Software Foundation promote and guide students on applying for GSOC. Though there are very few open source software organaizations located in Sri Lanka, the contribution they have made with the participation of University of Moratuwa towards this remarkable success is marvelous.
Finally I congratulate all the Sri Lankan students who were accepted in GSOC for last 4 years and made this small island, Sri Lanka into a rising star.
Wednesday, April 1, 2009
How to build Apache ODE trunk and 1.x branch using Apache Buildr
Before building a source first of all the source should be downloaded from an on-line repository or off-line source distribution. On-line repositories contains the latest updates to the code. So if your intention is to develop the source code downloading the source from on-line repository will be recommended.
Here I have described how to build the source from the on-line repository.
Apache ODE(Orchestration Director Engine) supports for “Subversion”. So first of all you have to install it.
Then use the command
svn checkout http://svn.apache.org/repos/asf/ode/branches/APACHE_ODE_1.X ode-1.X
to download the source.
Then you can build the source. But for that you need Apache Buildr as the build tool. Go for the Buildr installation guide if you haven't installed Apache Buildr.
Then using the command “buildr _1.2.10_ clean install TEST=no” you can build Apache ODE 1.x branch.
Or If you want to build Apache ODE from trunk then use the following command.
svn checkout http://svn.apache.org/repos/asf/ode/trunk ode-trunk
Now you have the source of ODE trunk. But you may need to install another version of Buildr which is >=1.3.2.Then using the command “buildr clean install TEST=no” you can build Apache ODE trunk.
Wednesday, March 11, 2009
How to convert an Java.Lang.String to w3c.dom.Element
Using javax.xml.parsers.DocumentBuilder class, an application programmer can obtain a org.w3c.dom.Document from XML.
This public org.w3c.dom.Document parse (InputStream is) has also other overloaded implementations for parsing a file; using the file name or the file objec(java.io.File)
Then you can retrieve the org.w3c.dom.Element by
org.w3c.dom.Element e = doc.getDocumentElement();
This public org.w3c.dom.Document parse (InputStream is) has also other overloaded implementations for parsing a file; using the file name or the file objec(java.io.File)
Then you can retrieve the org.w3c.dom.Element by
org.w3c.dom.Element e = doc.getDocumentElement();
Wednesday, January 21, 2009
Eco Equilibrium - Photo of the Month

Location - A rural area in Anuradhapura, Sri Lanka.
Camera - Sony CyberShot W130
From OSGi 4.1 to OSGi 4.2
A descriptive article about major step forwards from OSGi 4.1 to OSGi 4.2
Some thought on the OSGi R4.2 early draft
Friday, January 16, 2009
WSO2 Annual Award Ceremony 2008

WSO2 Annual Award Ceremony 2008 held at Colombo rowing club on 15th January 2009. The 11 Most tremendous contributors in WSO2 were rewarded with Hotel tickets and cash prizes.
I personally congratulate them for a better future.
Keith Chapman
Nandana Mihindukulasuriya
Prabath Siriwardena
Amal Rangana
Dimuthu Gamage
Afkam Azeez
Charitha Kankanamge
Ruwan Linton
Samisa Abeysinghe
Sumedha Rubasinghe
Hasmin AbdulCader
As well I congratulate all of WSO2 team members who are very supportive to each other.
Monday, January 12, 2009
Configure Eclipse(3.4) Ganymede for Eclipse BPEL designer with Apache ODE 1.x
(These steps are for Linux operating systems with gtk window systems)
First of all you have to download the JAR containing ZIP in the following link.
http://www.megaupload.com/?d=3D73V97D
Then extract them and copy them in to the eclipse plug-in folder.
Them you have to install Apache ODE 1.x to your system.
- For this First download Apache Tomcat
- Then download the WAR distribution of Apache ODE 1.x
- Then extract and copy the WAR distribution in to the Apache tomcat's webapps folder (This webapps folder contains inside the Apache Tomcat installation folder.)
Start Eclipse Ganymede
Goto the server window (If it isn't visible goto Window->Show View->Servers)
Right click on Server window ->New->Server
Choose Apache ODE v1.x ODE Sever, Then Next
Choose correct configuration details
- Choose JRE as JDK 1.5.x
- Fill the location for Apache ODE path (to the WAR distribution directory inside Apache Tomcat webapps directory)
- Fill the location for Apache Tomcat path (To the Apache Tomcat installation directory)
Then all is configured.
Now You can start your own BPEL project on Eclipse and designed it using BPEL designer.
Subscribe to:
Posts (Atom)